How to publish a static website to Azure Static Web Apps
Introduction
With a statically-built website, you have a variety of options when it comes to hosting. You can self-host on your own VPS, or use Netlify, Cloudflare... the world is your oyster. On Azure, you can try Azure Static Web Apps. Let's see how it works!
What's Azure Static Web Apps
The primary use case is to build and deploy your app from a code repository like Github. As soon as code is merged to main, a task runs, and your changes are live. We did this in the Heroku heyday.
You can use Azure Static Web Apps (SWA from now on) in various ways.
The simplest would be to host plain HTML files with no build step at all.
Or, build your HTML using a static-site generator (SSG from now on) like Hugo or Eleventy.
Or, build a SPA app with React, Vue, etc.
If your app is not really "static" and needs dynamic content, that's where Azure Functions comes in.
We might explore that in a later article, but for today, we'll skip this. Suffice to say, Azure Functions is "married" to SWA and provides the "A" (=API) for running JAMstack apps on Azure.
Why use Azure Static Web Apps for a static site
You should consider SWA for your static site when the following features appeal to you:
- automatic deployment from a source code repository
- an option to add dynamic capabilities (APIs) to your site in the future
If neither is a concern and you prefer to deploy your site manually (with a CLI), you can always use Azure Blob Storage with Azure CDN and call it a day. SWA isn't set up for deployments that do not originate in a code repository (but there are workarounds, of course).
Another good argument is that for non-planet-scale blogs and websites, you can deploy to Azure Static Web Apps for free. That includes a free, self-renewing SSL certificate (by DigiCert, not Letsencrypt as is customary elsewhere.)
Should you need more than 100GB of traffic per month, you can switch to a paid plan and get a global CDN as an additional perk (currently in preview).
The setup
The official quick-start guide assumes you've got nothing: no code, no domain, and no content.
That makes it easier to explain the basics, I suppose. Most of you already have a website or a blog, however. I will tailor this guide to those migrating an existing site instead of starting from scratch.
Create the Azure resources
First, let's create the Azure resources and get your site up and running. We'll do this on the Azure Portal, but you can also use a CLI.
Create a resource group (or pick an existing one), then proceed to create the SWA. There's a simple dialog where you pick the subscription and resource group, choose a name for your SWA, the hosting plan, location, and deployment source.
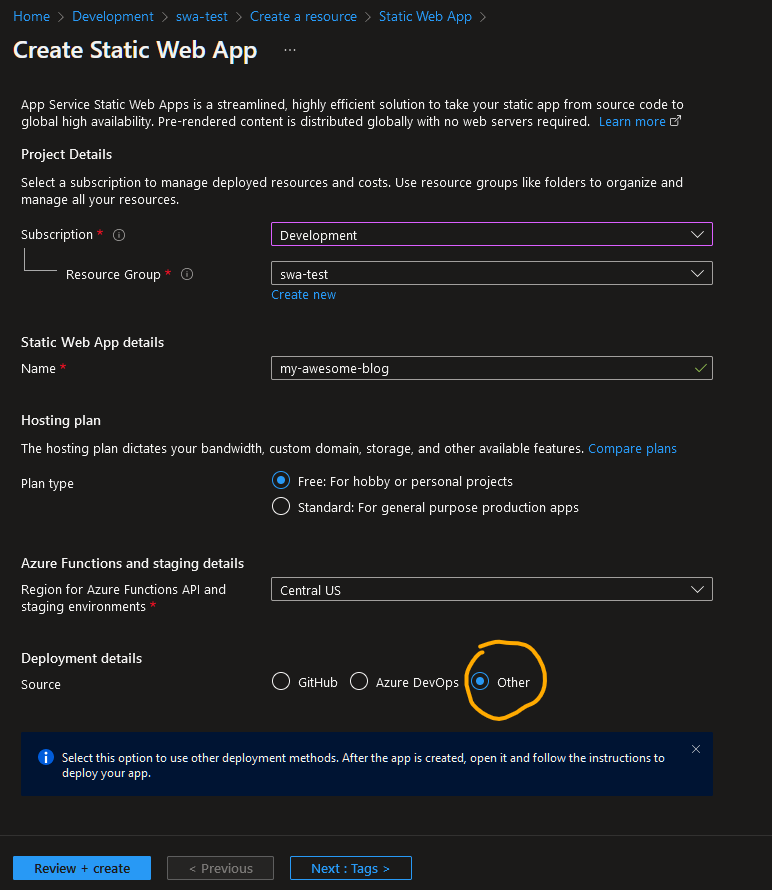
You could pick Github right away and go through the auth flow. It is not necessary, however, as you will see shortly.
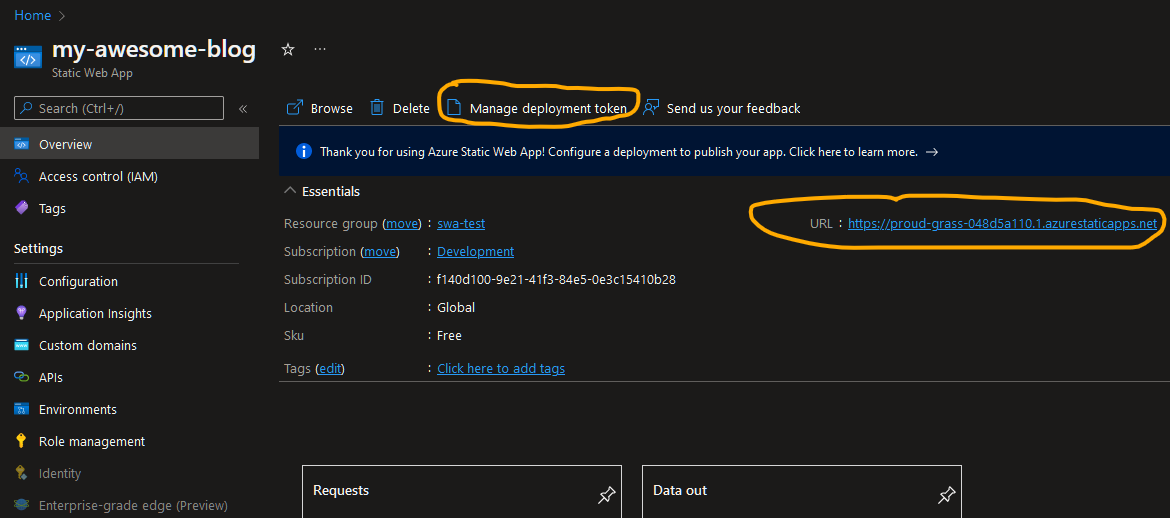
After Azure creates the site, navigate to it and copy the deployment token. You'll need it for the Github workflow. Also, take note of the auto-generated URL for your site. We will create a custom domain later, and we will need the URL for it.
Create the Github workflow
Following the official build configuration guide will get you 90% there. Here, I am simplifying it even more under two assumptions:
- since your site is 100% static, you don't need to worry about building the APIs,
- you don't need pull requests as you publish directly to
main. If that's not the case, you can follow the official guide to incorporate PRs into your workflow.
We are using the official Github action for deployment to SWA.
Create an empty file in the folder .github/workflows of your repository and give it a name, e.g., azure-static-web-apps-myblog.yml. Copy and paste the following, then edit output_location and app_build_command to match your config.
name: Azure Static Web Apps CI/CD

on:
  push:
    branches:
      - main # You can change it to whatever is your deployment branch

jobs:
  build_and_deploy_job:
    runs-on: ubuntu-latest
    name: Build and Deploy Job
    steps:
      - uses: actions/checkout@v2
      - name: Build And Deploy
        id: builddeploy
        uses: Azure/static-web-apps-deploy@v1
        with:
          azure_static_web_apps_api_token: $ # This is the deployment token for your SWA site
          repo_token: $ # Used for GitHub integration
          action: "upload"
          app_location: "/" # This will typically be the repository root
          api_location: "" # No API here, therefore
          skip_api_build: true # skip API build
          output_location: "_site" # Modify this to where your SSG places the built HTML - could be `dist`, `build`... check your config
          app_build_command: 'yarn build' # Not necessary since the action will pick it up from 'package.json' but I like it explicit
Before running the workflow, make sure that you put the secret AZURE_STATIC_WEBAPP_DEPLOYMENT_TOKEN to your "Actions secrets" of your Github repository.
That's it! Push to main and observe that your site will be built and deployed to Azure.
Adding a custom domain
I am assuming you already have a custom domain for your site. If not (e.g., you run it on Github pages without a custom domain), you can buy one and use it on SWA.
You have two options: keep your existing nameservers, or use Azure DNS.
The first option is often preferable as it minimizes the transition period from your old nameservers to Azure. However, it comes with a few caveats.
When you want to run your site on an apex domain (mydomain.com), your DNS provider must support the ALIAS record since SWA doesn't give you a fixed IP address.
A CNAME would also work, but some providers won't let you point the apex domain to an URL. If you run your site on a subdomain (e.g., blog.mydomain.com), you can simply create a CNAME for blog and point it to the URL Azure generated for your site.
I wanted to use an apex domain, and my provider did not meet these requirements, so I moved my DNS records to Azure.
The following section only applies to you if you are in the same boat. If you can set up the correct DNS records at your current provider, do that instead!
Setting up Azure DNS
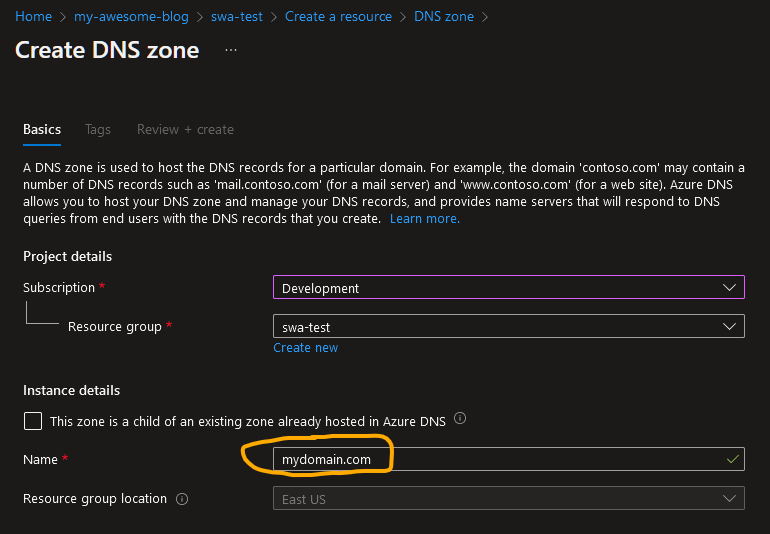
Create a new resource of type DNS Zone in your resource group.
Then, navigate to your current DNS provider and copy all records to your new Azure DNS zone. You will do so via the "+ Record set" menu.
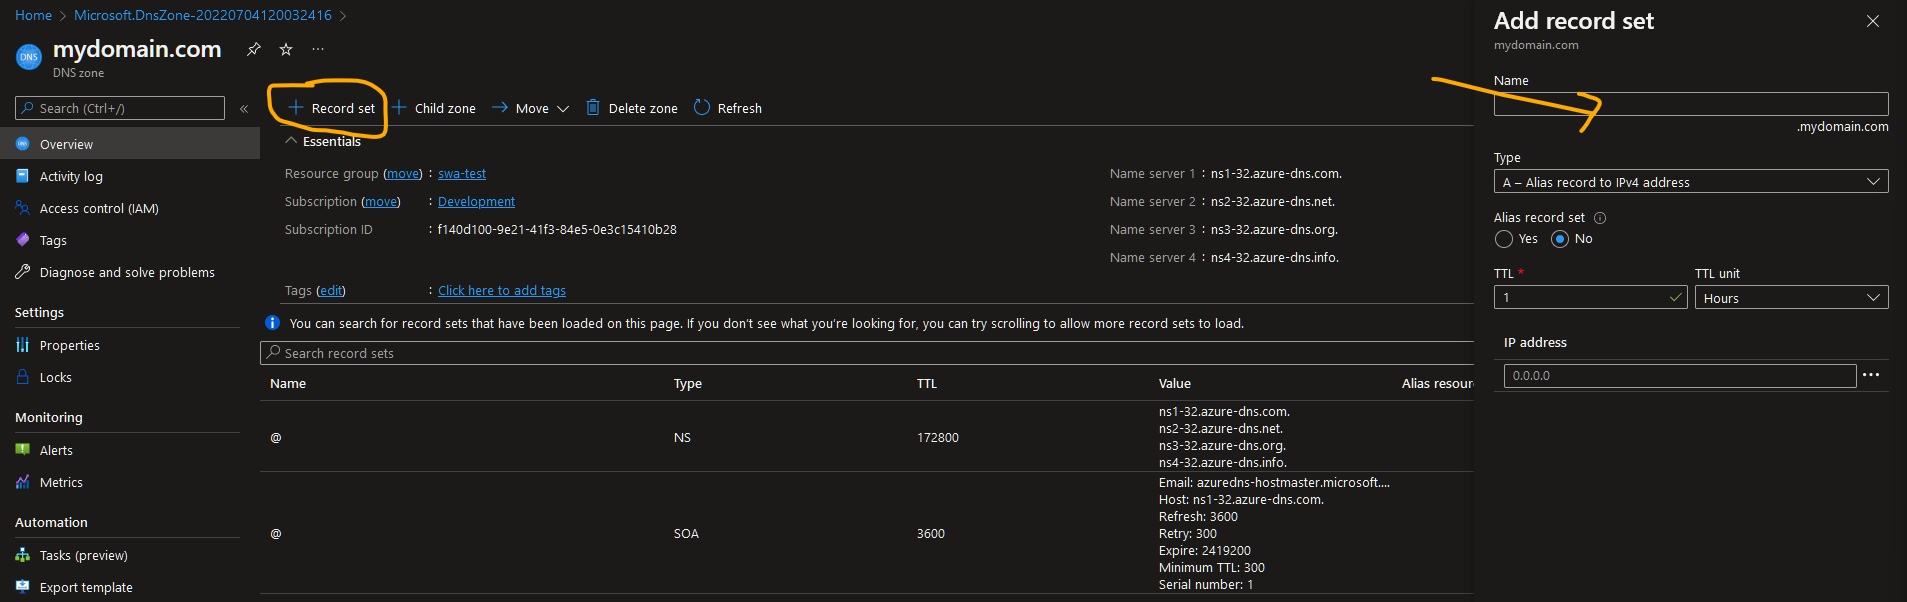
You'll want to make sure (REALLY make sure) that you've copied ALL of the records you need. You don't want to leave out the MX records, for example, and stop receiving emails... I guess 🤷♂️ (HELLO, Inbox Zero!)
Before continuing, switch your nameservers to Azure.
I wish I could postpone this step, but Azure wouldn't let me add the custom domain until I did so. I'd imagine it could have something to do with them trying to create an SSL certificate for you, but I could be wrong. If you know, please let us know in the comments below!
Connecting the custom domain
If you're using Azure DNS, it's now simpler as Azure will do the domain validation for you. Otherwise, you'll create a few TXT and CNAME records at your DNS provider.
Navigate to your SWA and select Custom domains. Then, add one (for subdomains like blog.mydomain.com) or two (for apex domains that include the www subdomain).
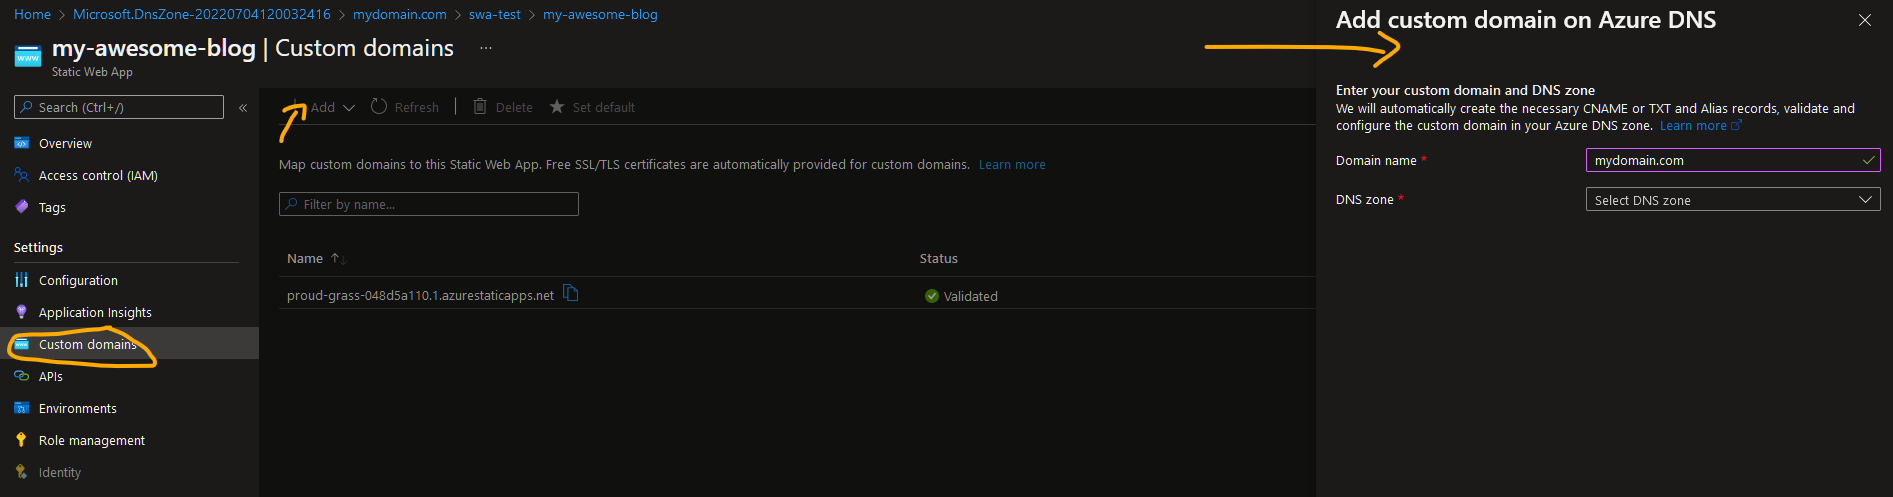
With a domain hosted in Azure DNS, you'll be done sooner than if Azure has to validate your domain. When I did that (before ultimately transferring my nameservers to Azure), it took a long time - 15, maybe 20 minutes - before Azure picked up on the verification DNS records.
When all is done and green, I would pick the default domain. For a subdomain like blog.mydomain.com, that's an easy choice. When using an apex domain and www, choose one or the other depending on which one you prefer. Azure will then redirect requests to your default domain, which is what you want.
Verifying your setup
If you have migrated your nameservers to Azure, this will take hours until the DNS changes propagate.
A good way to test is to look at the SSL certificate. If you've used Letsencrypt before, your site is now protected by DigiCert. As long as you see the old certificate, you're still looking at the "old" site.
Conclusion
I have done this migration for my agency website, and I managed it in a single afternoon.
It's not difficult at all; just a few gotchas are waiting for you down the road.
For me, the main benefit is the automated deployment once I push to main. I preview all changes locally, and I don't have an editor who would go through my copy and improve it.
If that were the case (e.g., a hired copywriter would submit a PR to me), I would add the pull requests to the mix. I have not yet tested this, but Azure supposedly generates preview environments for your PRs!
That's something I might look into very soon, as well as adding the Azure Functions into the mix.
P.S.
If you feel like we'd get along, you can follow me on Twitter, where I document my journey.
Published on